
The Joys of Preserving Garden-Fresh Green Beans
There’s something truly special about the crisp snap and vibrant flavor of freshly picked green beans from your garden or local farmer’s market. As the summer harvest comes in abundance, preserving that garden-fresh taste for enjoyment throughout the year becomes a delightful endeavor. Freezing green beans is not just a practical way to reduce food waste – it’s an act of care for your future self and loved ones, ensuring nutritious, homegrown goodness is always within reach.
In this guide, we’ll explore the simple yet rewarding process of freezing green beans, allowing you to capture the essence of summer in your freezer and spread a little joy with every future meal. Whether you’re an experienced gardener or simply someone who appreciates the wholesomeness of fresh produce, learning to freeze green beans is a valuable skill that connects us to the rhythms of nature and the warmth of home-cooked meals.
Selecting and Preparing Your Green Beans
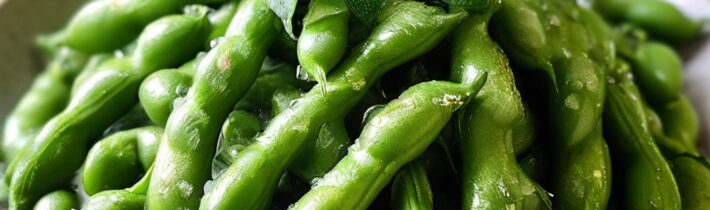
The journey to perfectly frozen green beans begins with choosing the right produce. Look for beans that are:
- Bright green and firm to the touch
- Free from blemishes or brown spots
- Crisp enough to snap easily when bent
Once you’ve gathered your beans, it’s time to prepare them with care:
- Wash the beans gently in cool water, removing any dirt or debris.
- Trim the ends, removing the stem and any tough bits.
- If desired, cut longer beans into 1-2 inch pieces for easier storage and use.
Remember, this process is not just about efficiency – it’s an opportunity to connect with your food, appreciating the effort that went into growing these nutritious vegetables. Take a moment to be grateful for the abundance nature provides.
The Blanching Process: Preserving Color and Nutrients
Blanching is a crucial step in freezing green beans that helps maintain their vibrant color, texture, and nutritional value. This quick cooking process halts enzyme actions that can lead to loss of flavor, color, and texture. Here’s how to blanch your green beans with care:
- Bring a large pot of water to a rolling boil.
- Carefully lower the prepared beans into the boiling water.
- Allow the beans to cook for 3 minutes for crisp-tender beans, or up to 5 minutes if you prefer them softer.
- While the beans are blanching, prepare a large bowl of ice water.
- After blanching, immediately transfer the beans to the ice bath to stop the cooking process.
- Once cooled, drain the beans thoroughly and pat them dry with clean kitchen towels or paper towels.
This process not only prepares your beans for freezing but also brightens their color, making them a joy to behold when you’re ready to use them in future meals.
Packaging and Freezing: Sealing in the Goodness
Now that your green beans are blanched and dried, it’s time to package them for the freezer. This step is about more than just storage – it’s about preserving the love and care you’ve put into preparing these vegetables. Here are some mindful packaging tips:
- Use freezer-safe bags or containers to protect against freezer burn.
- Remove as much air as possible from bags to prevent ice crystals from forming.
- Label each package with the date and contents – a small act of kindness for your future self.
- Consider portioning the beans into meal-sized amounts for convenient use later.
As you seal each package, take a moment to envision the delicious meals these beans will become part of in the months to come. It’s a beautiful way to connect your present efforts with future moments of nourishment and joy.
Thawing and Using Your Frozen Green Beans
When the time comes to enjoy your frozen green beans, treat them with the same care you used in preserving them. Here are some gentle methods for thawing and using your beans:
- For best texture, use frozen beans directly in soups, stews, or casseroles without thawing.
- If needed, thaw beans in the refrigerator overnight for a slow, even defrost.
- For quick thawing, place the sealed bag in a bowl of cool water for about an hour.
- Once thawed, use the beans within 24 hours for optimal freshness and flavor.
Remember, these beans carry the warmth of summer and the care of your own hands. Whether you’re creating a comforting side dish or adding them to a hearty main course, let that love infuse your cooking.
Creative and Nourishing Ways to Enjoy Your Frozen Green Beans
Your carefully preserved green beans are a versatile ingredient that can bring a touch of homegrown goodness to countless dishes. Here are some heartwarming ideas to inspire your culinary creativity:
- Toss thawed beans with olive oil, garlic, and lemon zest for a simple, refreshing side dish.
- Add them to minestrone soup for a burst of color and nutrition.
- Create a comforting green bean casserole, perfect for sharing with loved ones.
- Stir-fry with other vegetables and your choice of protein for a quick, nutritious meal.
- Blend into a creamy green bean soup for a soothing lunch option.
Each time you prepare a dish with your frozen green beans, you’re not just nourishing your body – you’re also connecting with the care and intention you put into preserving them. It’s a beautiful reminder of the cyclical nature of growing, preserving, and enjoying food.
FAQ: Answering Your Questions About Freezing Green Beans
Q1: How long can I keep frozen green beans?
A1: When properly stored in airtight containers or freezer bags, frozen green beans can maintain their quality for up to 12 months. However, for the best flavor and texture, it’s ideal to use them within 6-8 months.
Q2: Can I freeze green beans without blanching?
A2: While it’s possible to freeze green beans without blanching, it’s not recommended. Blanching helps preserve color, texture, and nutritional value. Unblanched beans may develop a rubbery texture and lose flavor more quickly.
Q3: What’s the best way to season frozen green beans?
A3: Frozen green beans can be seasoned just like fresh ones. Try sautéing them with garlic and olive oil, or tossing with lemon juice and almonds. Remember, they’re already partially cooked, so they’ll need less cooking time than fresh beans.
Q4: Can I refreeze green beans after thawing?
A4: It’s generally not recommended to refreeze thawed green beans, as this can affect their texture and increase the risk of bacterial growth. It’s best to thaw only the amount you plan to use.
Q5: Are frozen green beans as nutritious as fresh ones?
A5: Yes! Frozen green beans can be just as nutritious as fresh ones, sometimes even more so. The freezing process locks in nutrients, and since they’re frozen at peak ripeness, they often retain more vitamins and minerals than fresh beans that have been transported and stored for long periods.
Freezing green beans is more than just a preservation method – it’s a way to extend the joys of the harvest season, to practice mindfulness in food preparation, and to ensure you always have a nutritious vegetable on hand for meals. As you master this simple yet rewarding process, you’re not just filling your freezer – you’re creating future moments of nourishment, comfort, and connection. Every time you open that freezer door and see your carefully preserved beans, let it be a reminder of nature’s bounty and your own capacity to create and nurture. Happy freezing, and even happier eating!
Related posts:
 The 7 Best Things to Stock Your Freezer With for Longevity
 The Art of Coffee Roasting: Uncovering the Secrets Behind a Perfect Cup
 Can You Eat Coffee Beans? Their Benefits and Side Effects
 12 Healthy Bean Recipes
 Preventing Freezer Burn: Tips for Preserving Your Frozen Foods
 Can Frozen Food Go Bad? The Surprising Answer
 Keeping Bananas Ripe: Tips and Tricks for Longer-Lasting Fruit
 Here’s How to Choose and Brew the Best Coffee Beans