
Introduction to At-Home Microdermabrasion
Achieving radiant, glowing skin doesn’t always require expensive spa treatments or dermatologist visits. With the rise of at-home skincare devices, you can now pamper yourself and rejuvenate your skin from the comfort of your own home. One such treatment that has gained popularity is at-home microdermabrasion. This gentle exfoliation technique can help you achieve smoother, brighter skin while nurturing your self-care routine. Let’s explore how you can embrace this skincare practice with compassion and mindfulness.
Understanding Microdermabrasion
Microdermabrasion is a non-invasive exfoliation treatment that gently removes the top layer of dead skin cells, revealing the fresh, youthful skin beneath. Traditionally performed in spas and dermatology offices, this technique has now been adapted for home use. At-home microdermabrasion devices typically use fine crystals or diamond-tipped wands to buff away dead skin cells, stimulate collagen production, and improve overall skin texture.
While professional treatments can be more intense, at-home versions offer a gentler approach that can be incorporated into your regular skincare routine. This allows you to nurture your skin consistently, promoting a healthy glow from within.
Benefits of At-Home Microdermabrasion
Embracing at-home microdermabrasion can offer numerous benefits for both your skin and your overall well-being:
- Improved skin texture: Regular use can help smooth rough patches and refine pores.
- Enhanced skin tone: By removing dead skin cells, microdermabrasion can help even out skin tone and reduce the appearance of dark spots.
- Boosted circulation: The gentle massage action stimulates blood flow, promoting a natural, healthy glow.
- Increased product absorption: By removing the barrier of dead skin cells, your other skincare products can penetrate more effectively.
- Stress relief: Taking time for self-care can be a meditative experience, helping to reduce stress and promote relaxation.
Remember, the goal is not perfection, but rather nurturing your skin and yourself. Approach at-home microdermabrasion as an act of self-love rather than a pursuit of flawless skin.
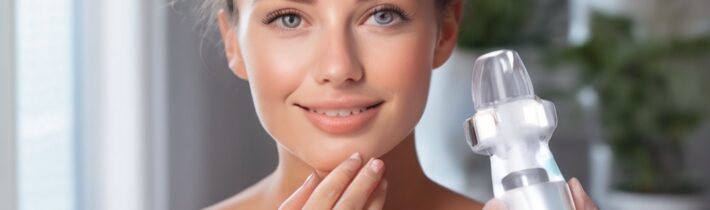
Choosing the Right At-Home Microdermabrasion Device
When selecting an at-home microdermabrasion device, consider your skin’s needs and your personal preferences. There are several types available:
- Crystal-based systems: These use fine crystals to exfoliate the skin, similar to professional treatments.
- Diamond-tip devices: These have a wand with a diamond-encrusted tip for gentle abrasion.
- Suction devices: Some tools combine exfoliation with suction to remove dead skin cells and stimulate circulation.
Choose a device that feels comfortable and suits your skin type. Remember, gentler is often better when it comes to at-home treatments. Listen to your skin and adjust accordingly.
Preparing for Your At-Home Microdermabrasion Session
Before beginning your at-home microdermabrasion treatment, create a calm, nurturing environment. This is not just about skincare; it’s about taking time for yourself and practicing self-compassion. Here are some steps to prepare:
- Cleanse your face thoroughly with a gentle, non-irritating cleanser.
- Pat your skin dry with a soft towel.
- If your skin is sensitive, you may want to apply a thin layer of a soothing serum.
- Take a few deep breaths to center yourself and set a positive intention for your self-care session.
- Ensure your device is clean and ready for use.
Approach this routine with mindfulness, treating it as a moment of connection with yourself rather than a chore.
Performing At-Home Microdermabrasion Safely and Effectively
When using your at-home microdermabrasion device, remember that gentleness is key. Here’s a general guide to help you through the process:
- Start with clean, dry skin.
- Hold your skin taut with one hand while using the device with the other.
- Move the device in upward, circular motions, avoiding the delicate eye area.
- Spend no more than 5-10 seconds on each area of your face.
- Be extra gentle on sensitive areas like your cheeks and around your mouth.
- After treatment, rinse your face with cool water and apply a hydrating, soothing moisturizer.
Listen to your skin throughout the process. If you experience any discomfort, stop immediately. Remember, the goal is to nurture your skin, not to push it to its limits.
Aftercare and Maintaining Your Glow
After your microdermabrasion session, your skin may be more sensitive than usual. Treat it with extra care:
- Apply a gentle, hydrating moisturizer to soothe and nourish your skin.
- Use a broad-spectrum sunscreen during the day, as your skin may be more susceptible to sun damage.
- Avoid harsh skincare products or makeup for at least 24 hours after treatment.
- Stay hydrated by drinking plenty of water to support your skin’s health from within.
Remember, true beauty comes from within. While microdermabrasion can help improve your skin’s appearance, it’s equally important to nourish your body and mind with healthy habits, self-compassion, and positivity.
Frequently Asked Questions
1. How often should I perform at-home microdermabrasion?
For most skin types, once a week is sufficient. However, listen to your skin and adjust accordingly. Some may benefit from treatments every two weeks, while others might only need it monthly.
2. Can I use at-home microdermabrasion if I have sensitive skin?
Yes, but proceed with caution. Start with the gentlest setting and perform a patch test first. If you experience any irritation, discontinue use and consult a dermatologist.
3. Will at-home microdermabrasion help with acne scars?
While it can help improve the appearance of mild acne scars over time, severe scarring may require professional treatments. Consistent use of at-home microdermabrasion can help maintain overall skin texture and tone.
4. Can I apply makeup after microdermabrasion?
It’s best to give your skin time to breathe after treatment. If possible, wait at least 24 hours before applying makeup. When you do apply makeup, make sure your brushes and products are clean to avoid irritation.
5. How long does it take to see results from at-home microdermabrasion?
You may notice a immediate glow after your first treatment, but consistent use over 4-6 weeks is typically needed to see more significant improvements in skin texture and tone. Remember, everyone’s skin is different, so be patient and kind to yourself throughout the process.
Related posts:
 Single-Ingredient Skincare: The Minimalist Approach to Glowing Skin
 Dr. Loretta Skincare Review: Effective, Science-Backed Formulas for Healthy Skin
 ZIIP: The High-Tech Skincare Device That’s Taking the Beauty World by Storm
 Neck and Shoulder Relaxation Device for Stress Relief
 An Esthetician’s Top Sephora Picks for Glowing Skin
 The Best Beauty Tools for Aging Skin, According to Experts
 Does this new prebiotic skin care line actually rebalance your microbiome? We asked derms
 CoverGirl Clean Fresh Skincare: The New Natural Beauty Line to Watch